Imagine that, one day you graduate from CUHK-Shenzhen and you don’t receive a paper diploma. While you are complaining it to your friend, saying that “the University is too stingy to give a single paper”, you receive an email, with title “Your Digital Diploma”. With curiosity, you open the email and it says, “Welcome to digital world. Attached is your e-diploma, and you can print it yourself”. Uh-huh, e-diploma? Sounds to be cool.
Recently, blockchain has become a hit topic, especially on cryptocurrencies. Someone says that it redefines “Trust” since using blockchain you no longer need to trust anyone but algorithm. What if it can be used to issue diplomas? But there is a sad story — the Massachusetts Institute of Technology, yes the MIT, has already announced that it will issue diplomas to around one hundred graduates utilizing the bitcoin. Failed to be the first in the world, what about let CUHK-Shenzhen be the first in Asia? It sounds to be a good idea.
Before we can issue CUHK-Shenzhen diplomas, let’s try to walk through the process. Luckily, MIT Media Lab open-sourced the whole toolkits so we can try.
Before we go on…
Before talking about BlockCert, we need to know some basic knowledges…
- Markle Tree
- Blockchain
- Digital Certificates (what and why)
What is Markle Tree?
(To be written)
http://www.cnblogs.com/fengzhiwu/p/5524324.html
What is Blockchain?
TL;DR: Blockchain stores all information and once info is kept it is signed and permantly stored. No one can modify or delete any information.
Blockchain is like a huge, global, and decentralized spreadsheet, keeping a track of who sent how many coins to whom, and what the balance of every account is. All people (miners) in the network stores and maintain the blockchain. When you check the information like transaction or personal balance, it reads data on the blockchain, not in any personal systems.
What is digital certificates?
The digital certificate is a digital document that validates the participation of a user in any activities defined. The digital certificate is characterized by storing all the relevant information of the certificate so that it can be verified by means of encryption methods.
Why digital certificates?
It is transparent: The digital certificate has the ability to be verified without the need to contact directly the institution that issues it, because it can verify the transaction and the identities of the participants (issuer and recipient of the certificate) since this information is public.
It is safe: On the other hand, while the transaction is public, the content of the certificate and the personal information of the sender and receiver is private.
Let’s Get Started!
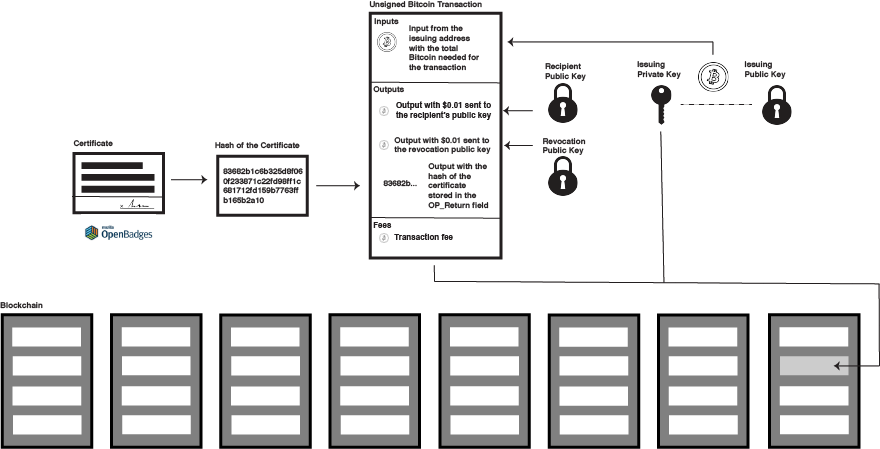
Overview of our digital certification architecture (Source: https://medium.com/mit-media-lab/what-we-learned-from-designing-an-academic-certificates-system-on-the-blockchain-34ba5874f196)
The toolkits consist of three parts:
- cert-schema: The data standard for digital certificates. The schema is actually an extension of Open Badges. A digital certificate is essentially a JSON file.
- cert-issuer: It takes a JSON certificate, creates a hash to identify the certificate, and issues the certificate by broadcasting a transation (Bitcoin or Ethereum) from the issuing institution’s address to a recipient’s address, with the bash embedded within the transaction data field.
- cert-viewer: A flask demo to display and verify digital certificates after been issued. It also provides the ability for users to request certificates and to generate a new Bitcoin identity.
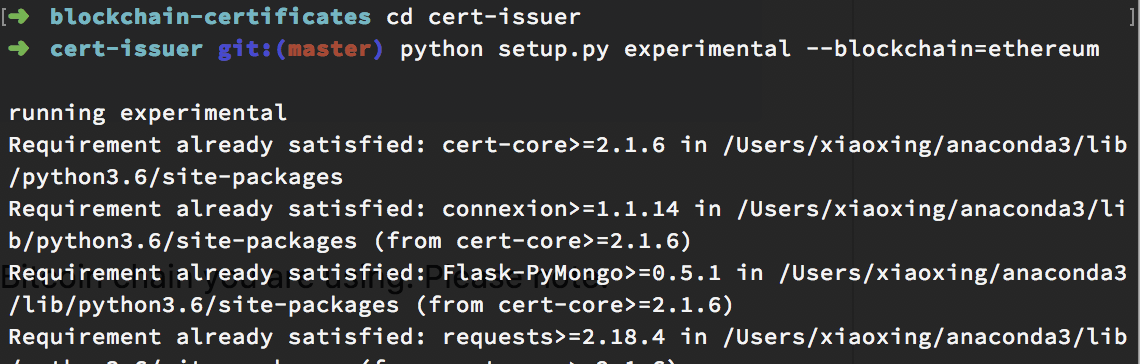
In this tutorial, we will talk about the second part — cert-issuer. We will not work on a real institution, since we are only to get a sense of it. And, we will use Ropsten Ethereum testnet, for the reason that we are poor to get real cryptocurrencies (just a joke).
Get the source code and Install required packages
Before get started, there is a side note that – Please use Python 3 in all environments.
You are highly recommended to use virtualenv.
1 | git clone https://github.com/blockchain-certificates/cert-issuer.git && cd cert-issuer |
You are expected to… fail. That’s because there are two conflicting libraries in the project. Merkletools requires “exactly” pysha3 1.01b, while cert-tools require pysha3 1.0.2 or greater. To solve the problem, go to the site-packages folder:
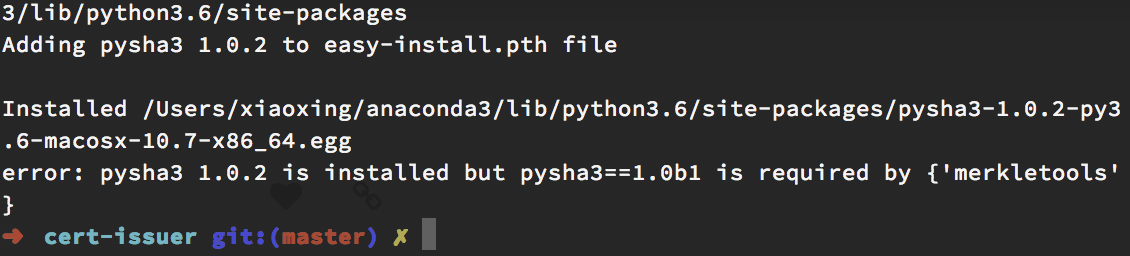
The folder after “Installed” is what we need. Then enter “merkletools-1.0.2-py3.6.egg” folder, edit the METADATA and replace “pysha3 (==1.0b1)” to pysha3 (>=1.0b1) then save. You need to do the same thing on metadata.json file.
If you don’t see these files, edit the one in /merkletools-1.0.2-py3.6.egg/EGG-INFO/requires.txt .
Go back to the cert-issuer folder and re-run
1 | python setup.py install |
Everything should be fine now.
Create an Ethereum issuing address
In Ethereum a public/private key pair is the same accross all test/main networks. So, we don’t need to have anew key pair if later we want it to run on main network (the one we will use real USD).
To create a new wallet, we can use a local wallet
First, go to https://www.myetherwallet.com/. If you plan to go further to production part, turn off your Internet connection when you are already on the create wallet page.
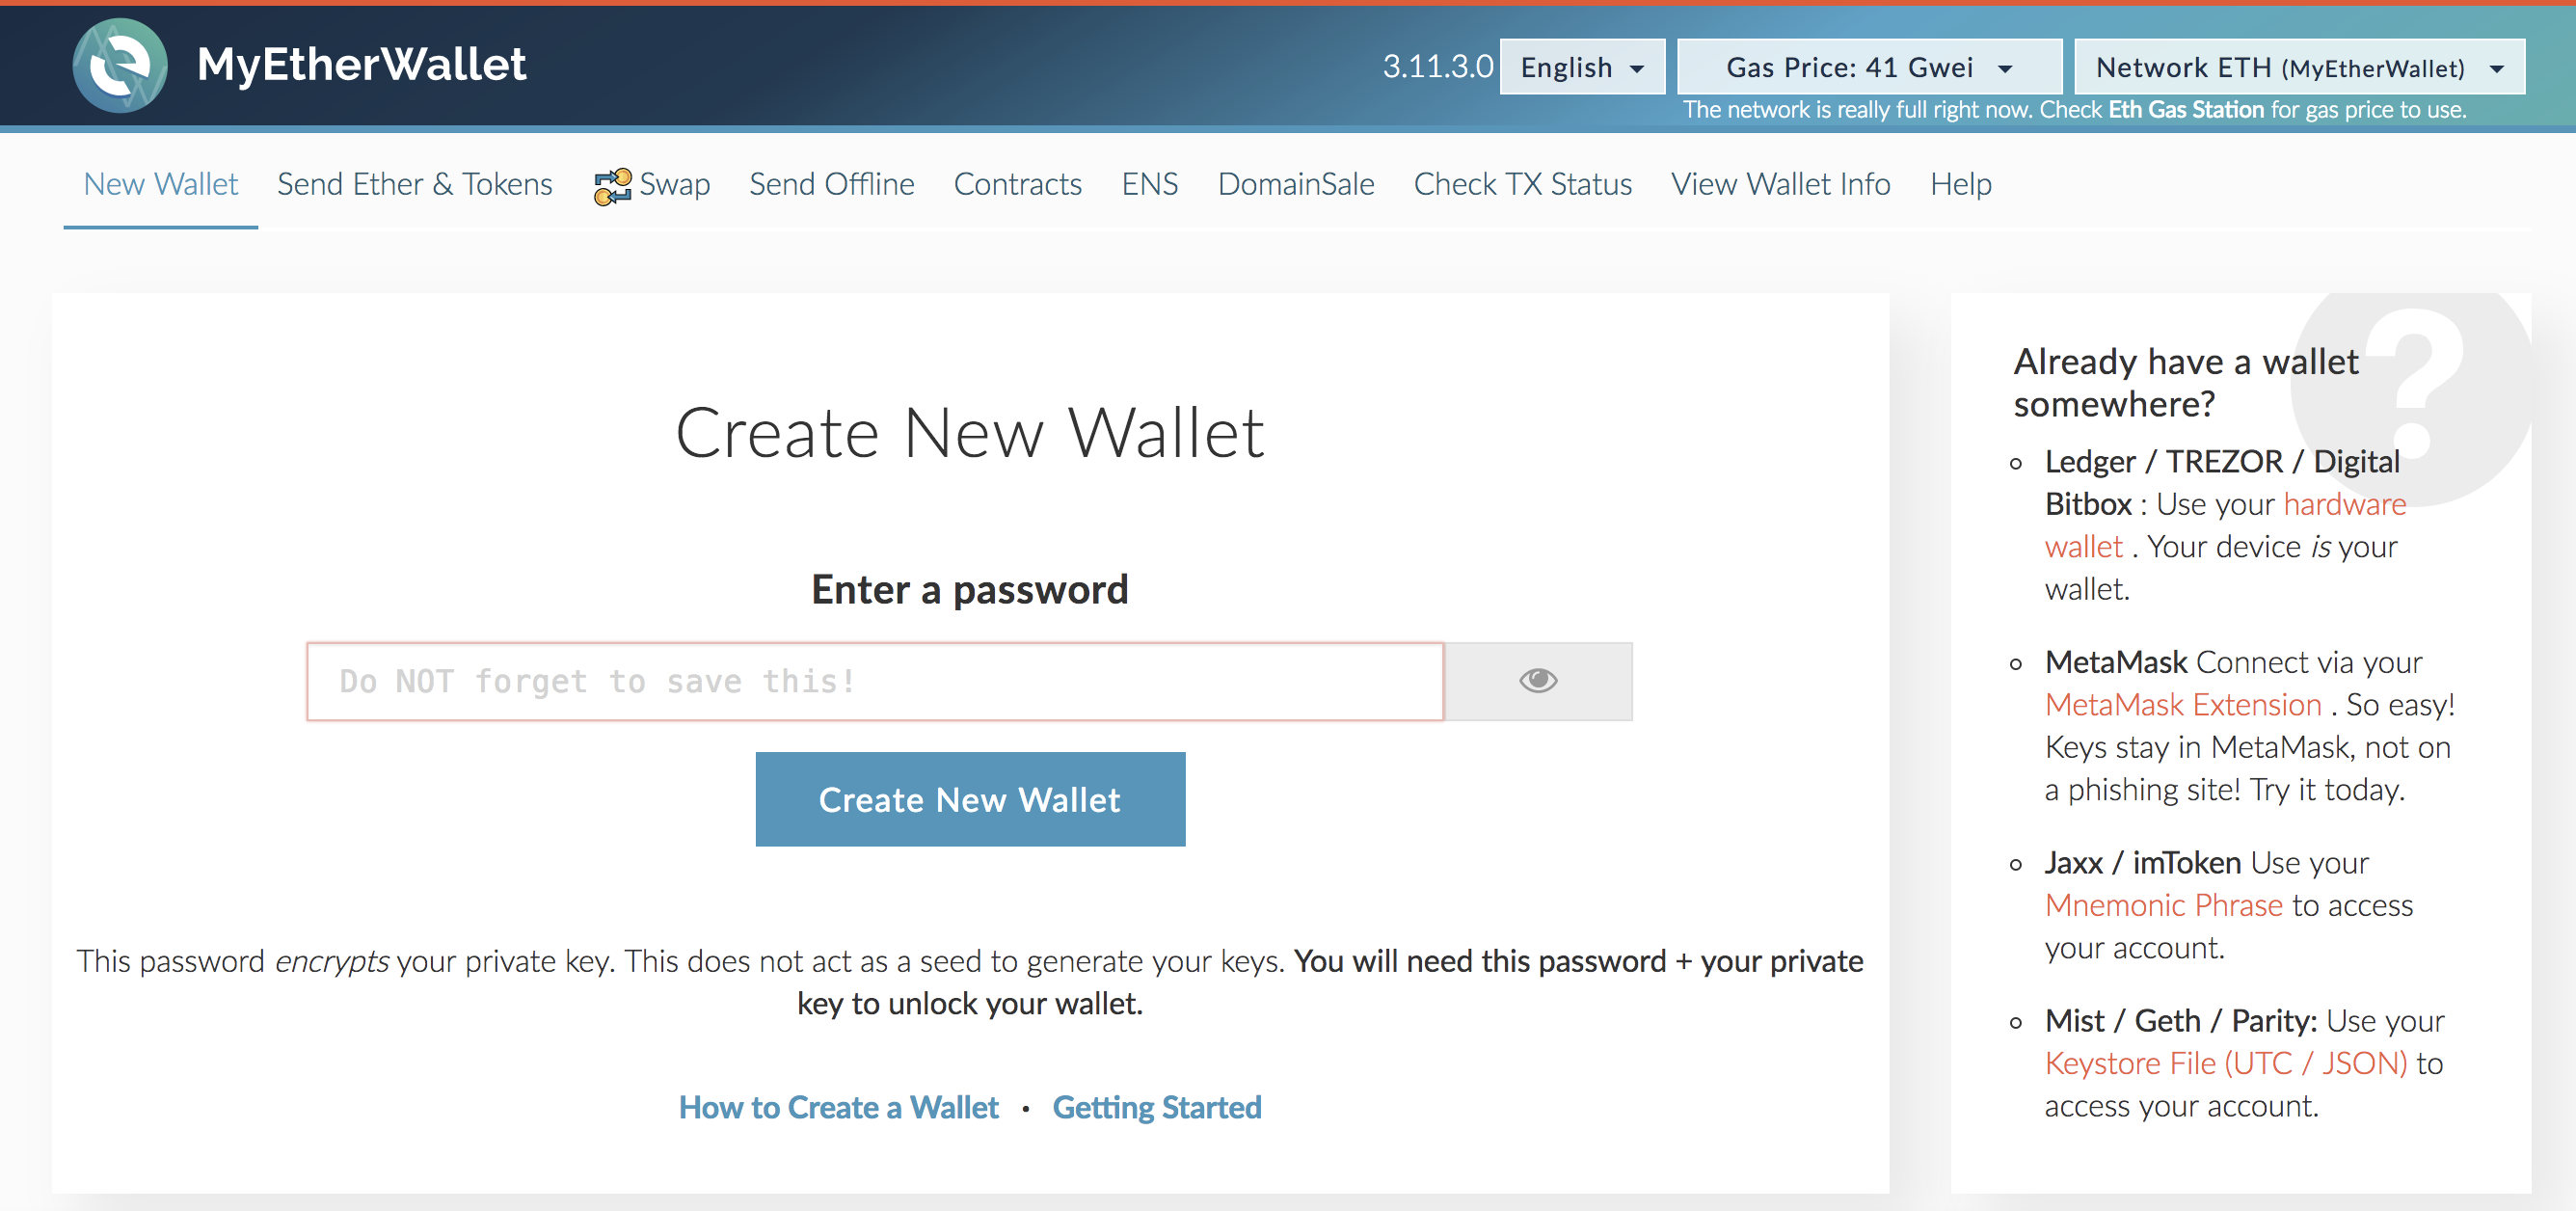
Do you see the big input box? Yes, enter your desired password for your wallet. Write it down somewhere and save it, otherwise you will lose your funds.
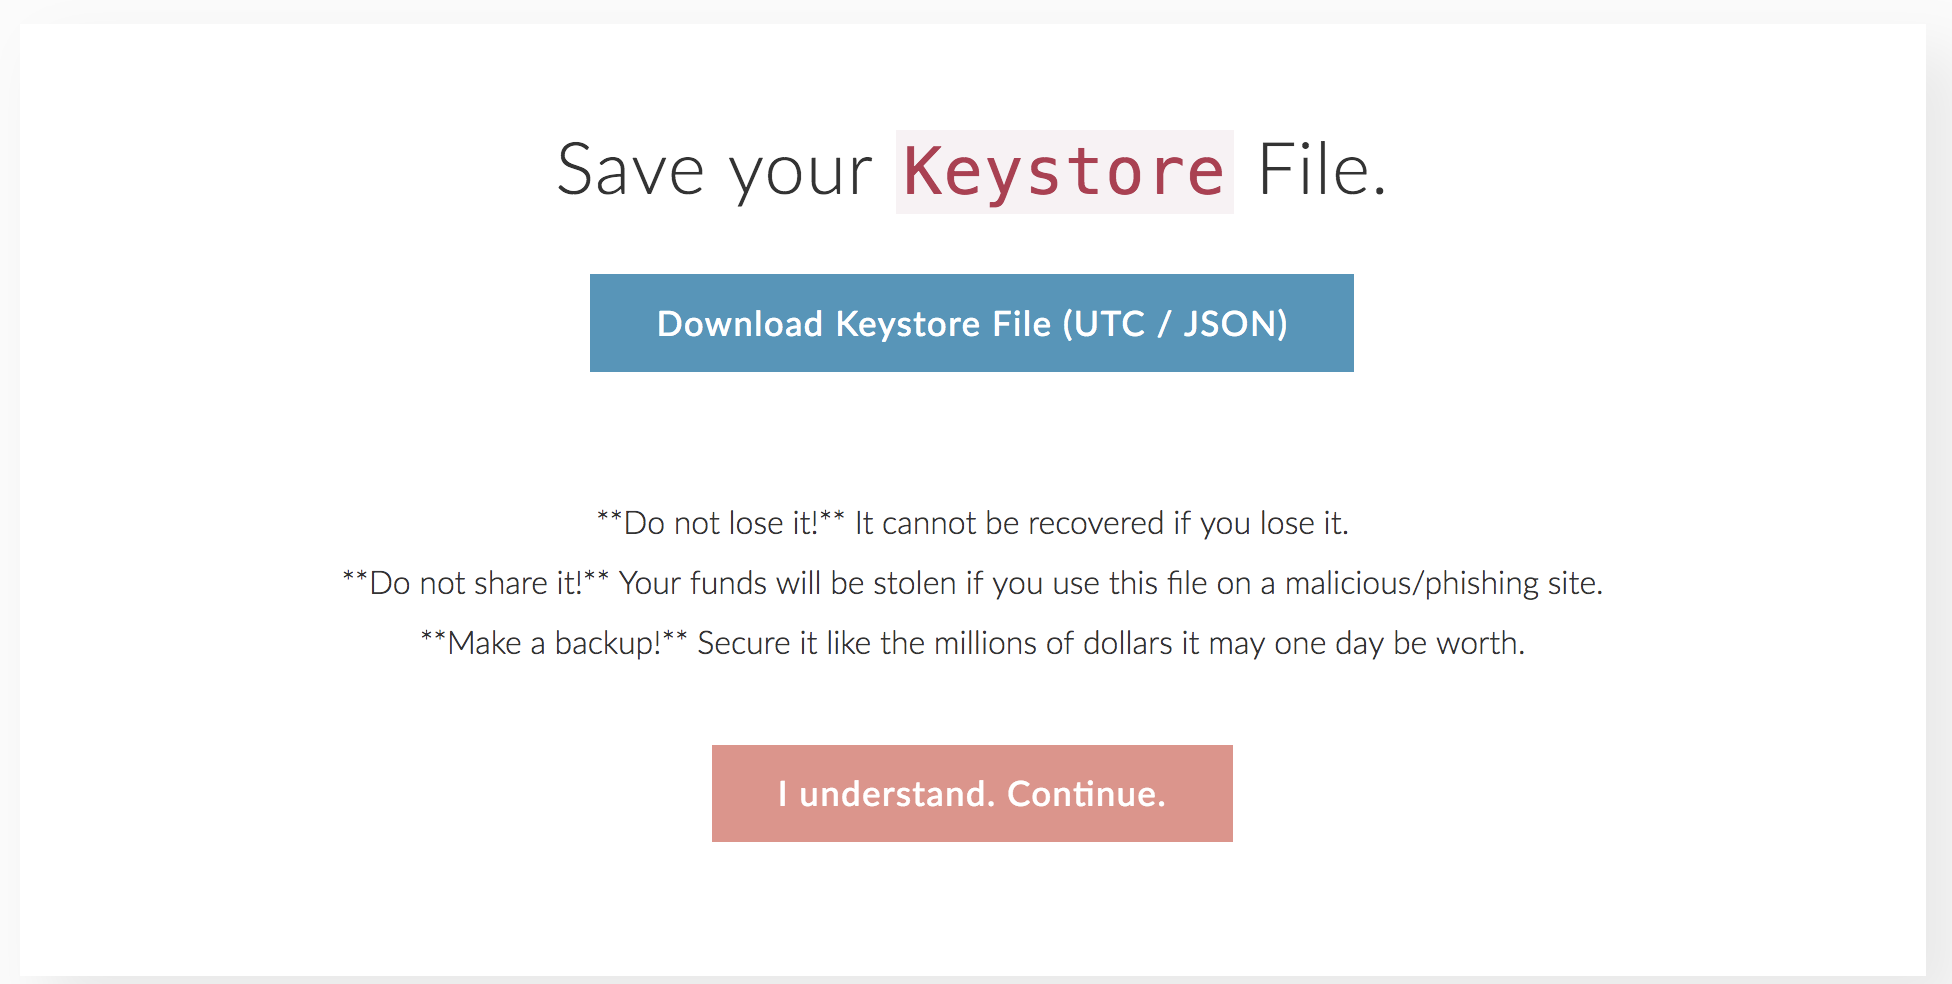
Then, you will be required to download a Keystore file. Read the instruction carefully, and, save it. After clicking Continue, you will see your private key.
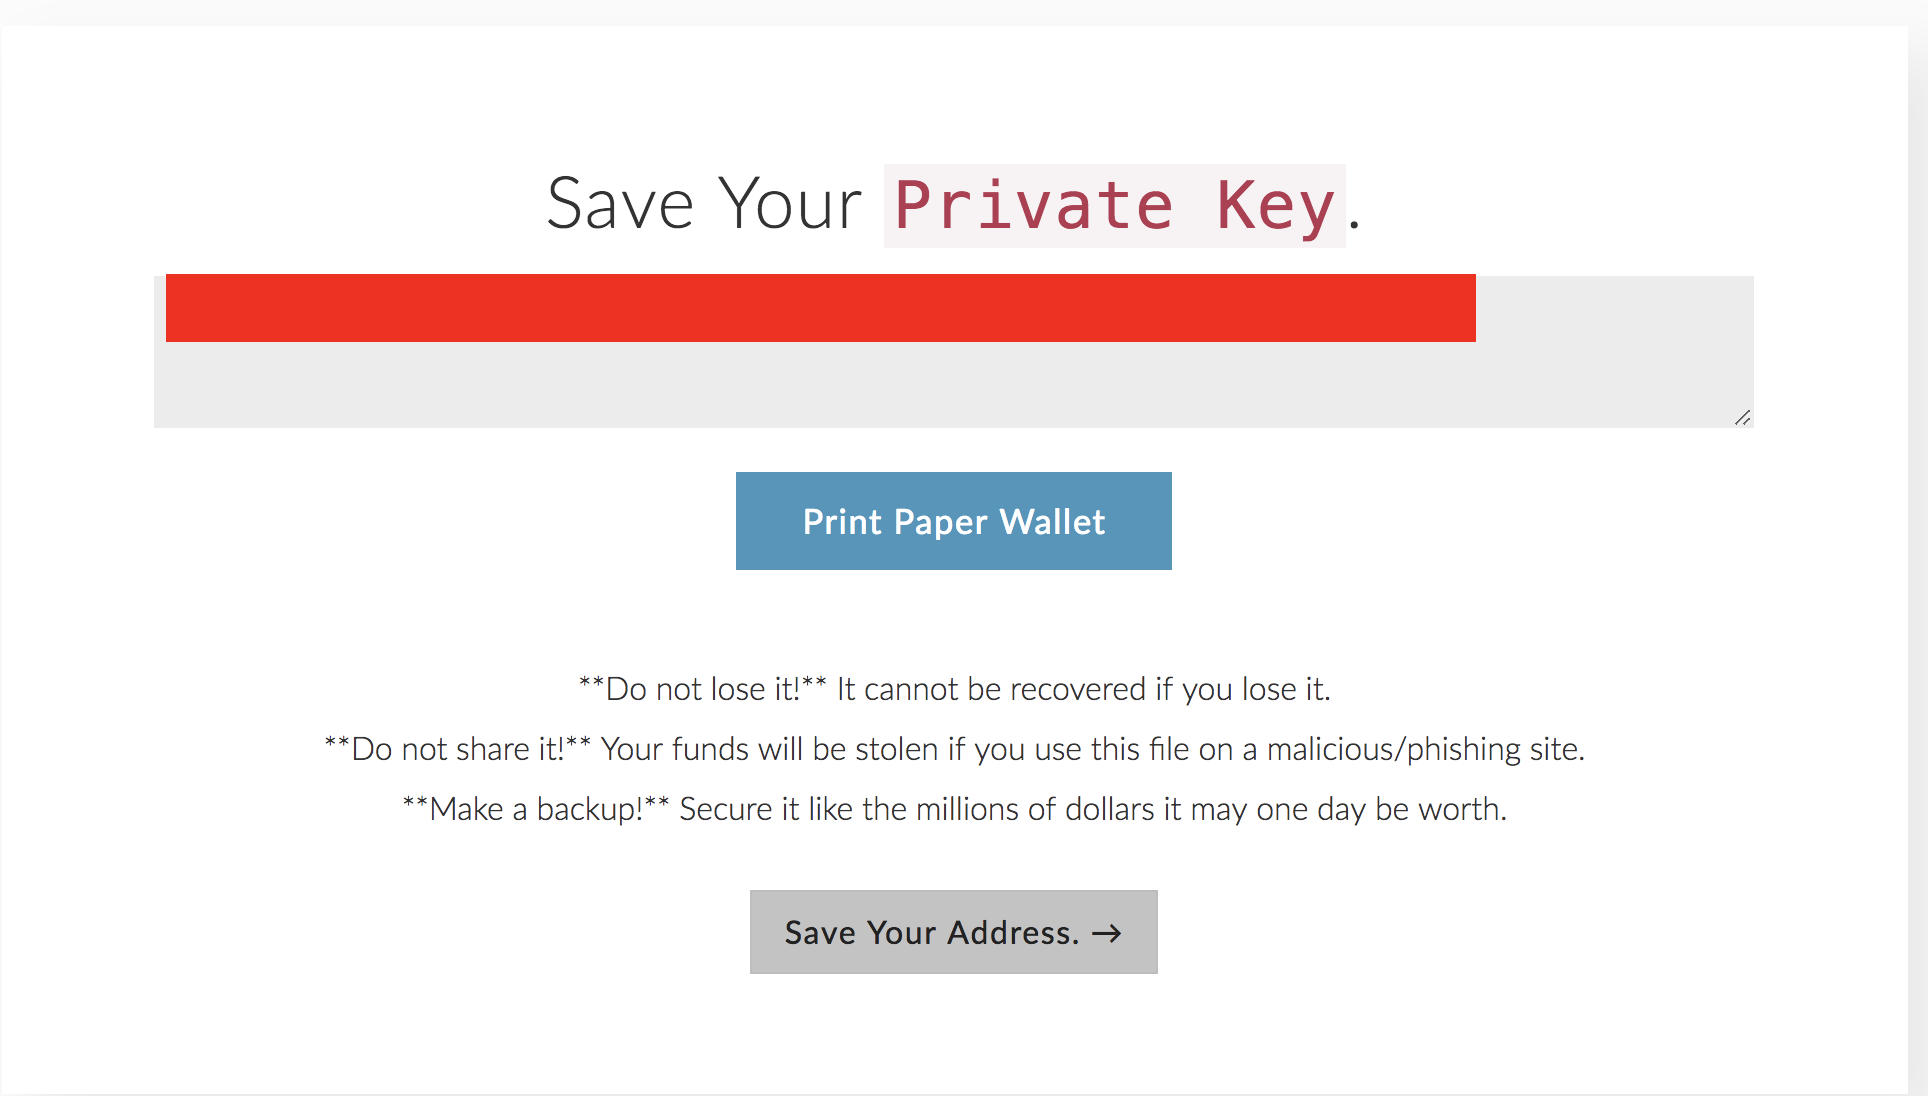
Of course, I won’t let you see it. Copy the private key. You should print a paper wallet (or save as PDF). The paper wallet looks like…
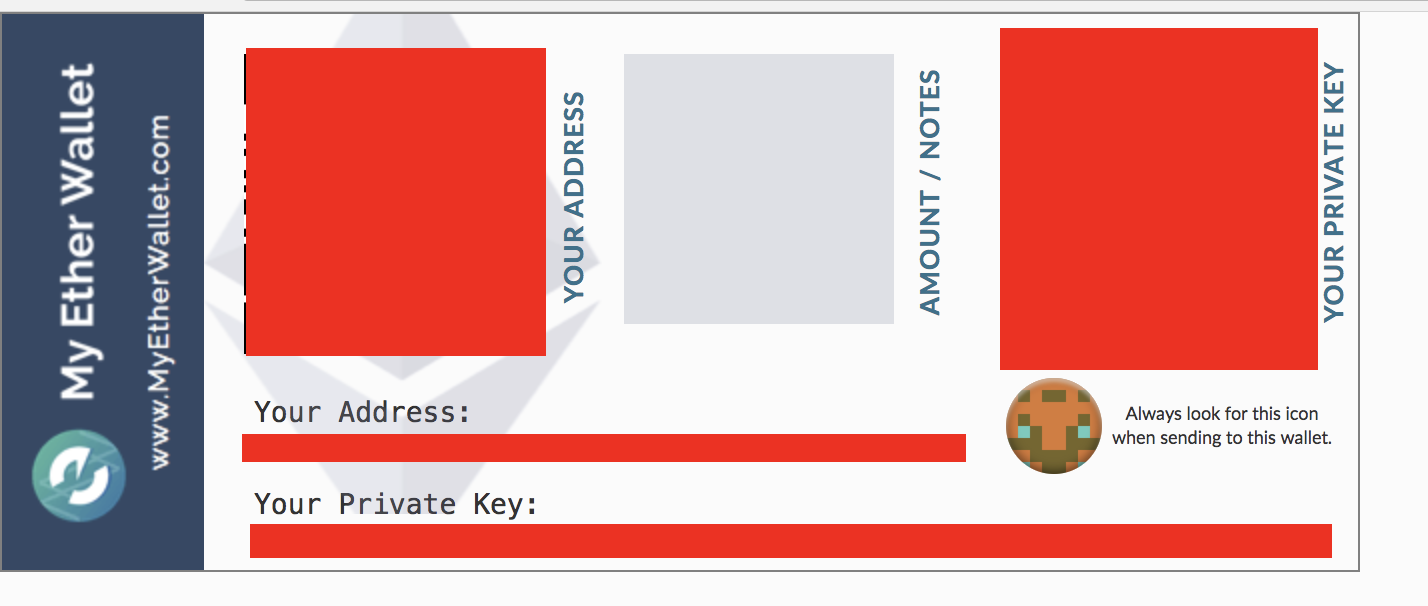
Yes, like a air ticket. Click the “Save Your Address” to continue. In next page, we will need to read the public key (known as Account # or Address). It is what you will use and share with people later. Find the colorful address icon. Make sure it matches your paper wallet & whenever you enter your address somewhere.
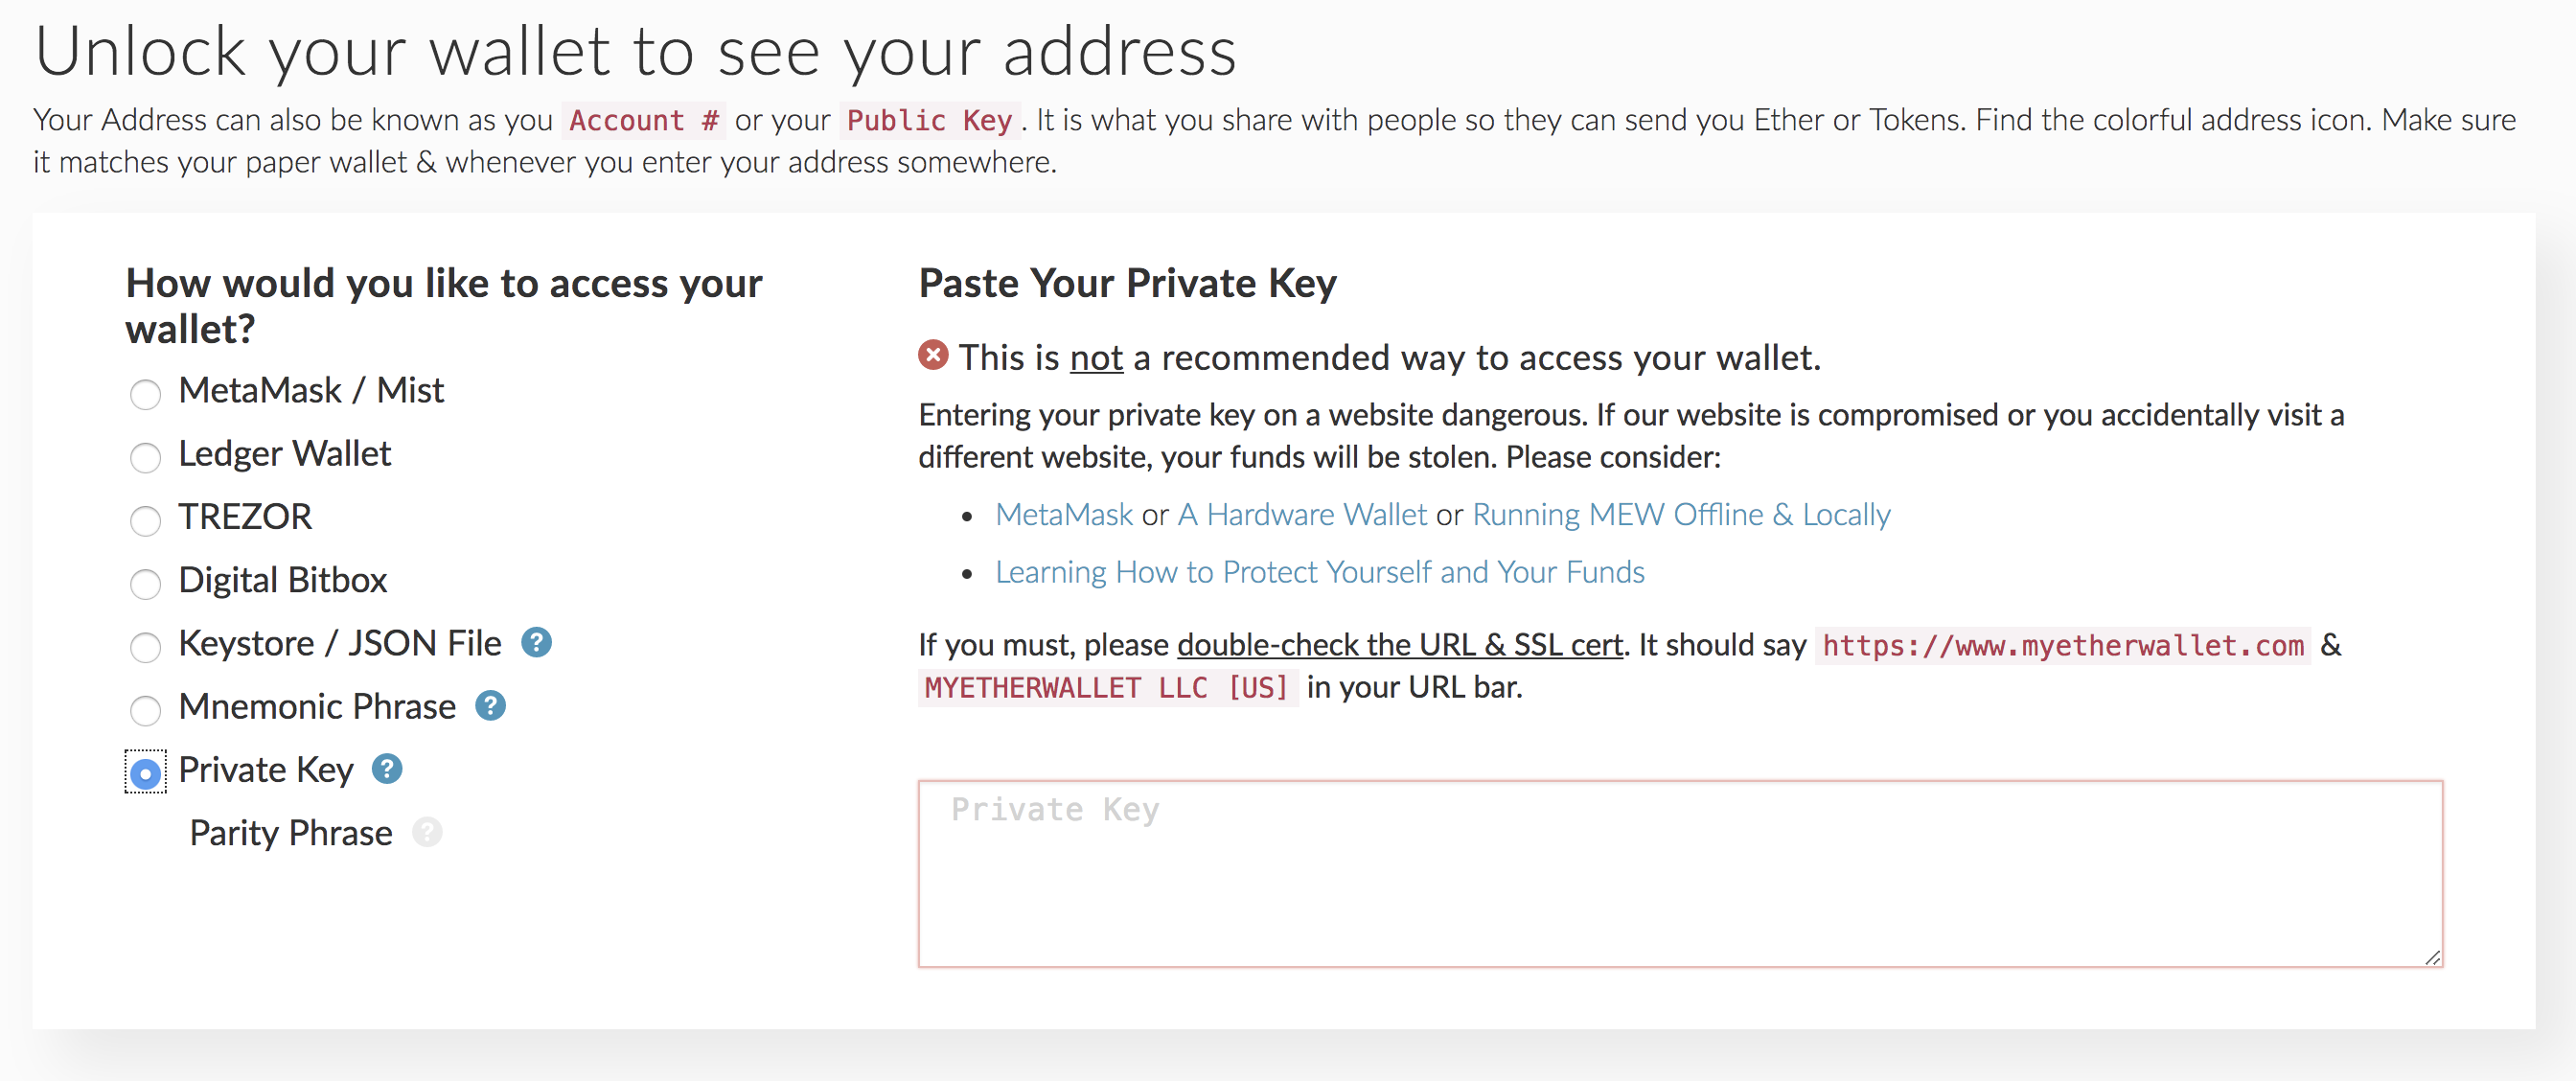
You may use the Keystore file or your Private Key to continue. Enter the wallet password. What? You forget it? Regenerate your wallet and remember the password.
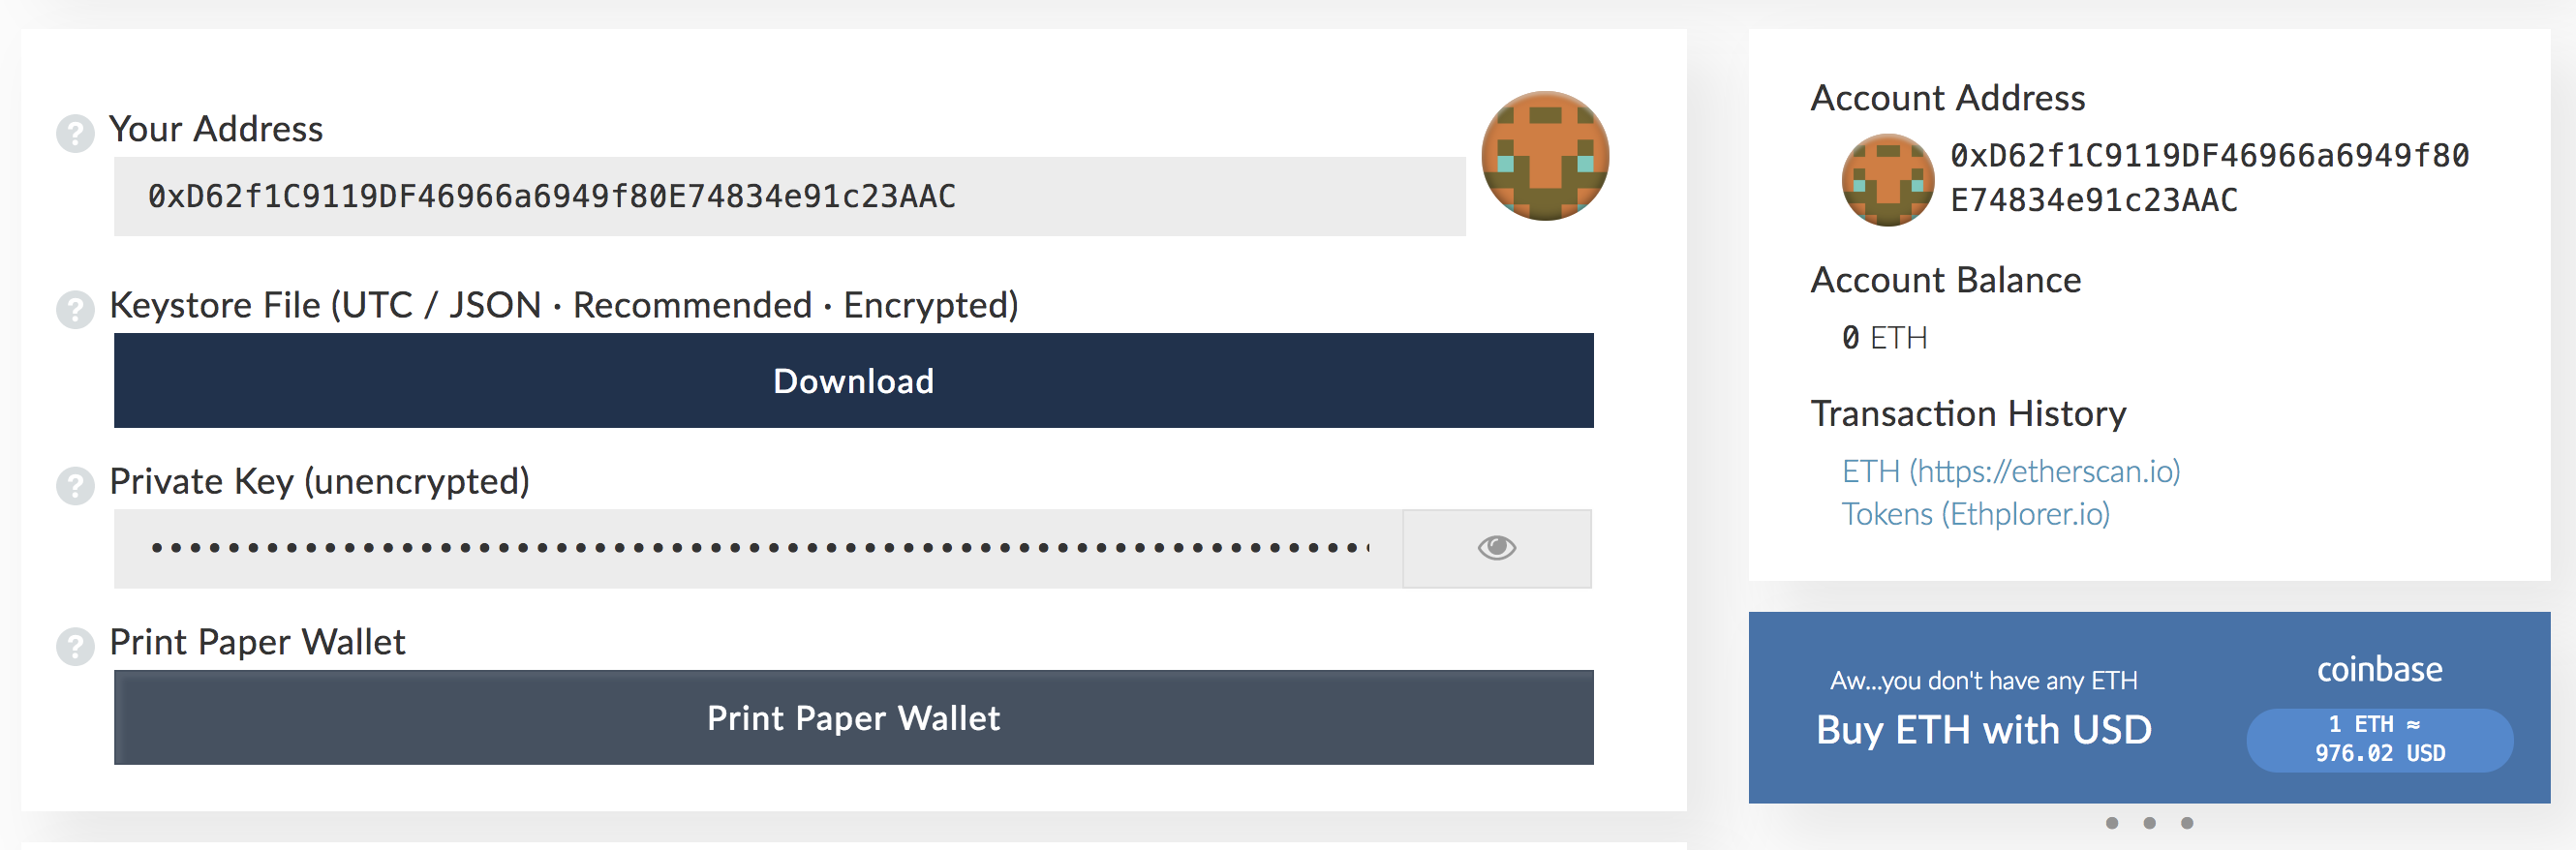
Here you will get your public address. Copy it and save for later use. (DON’T send ETH to this account. I already delete the private key.)
Get some coins
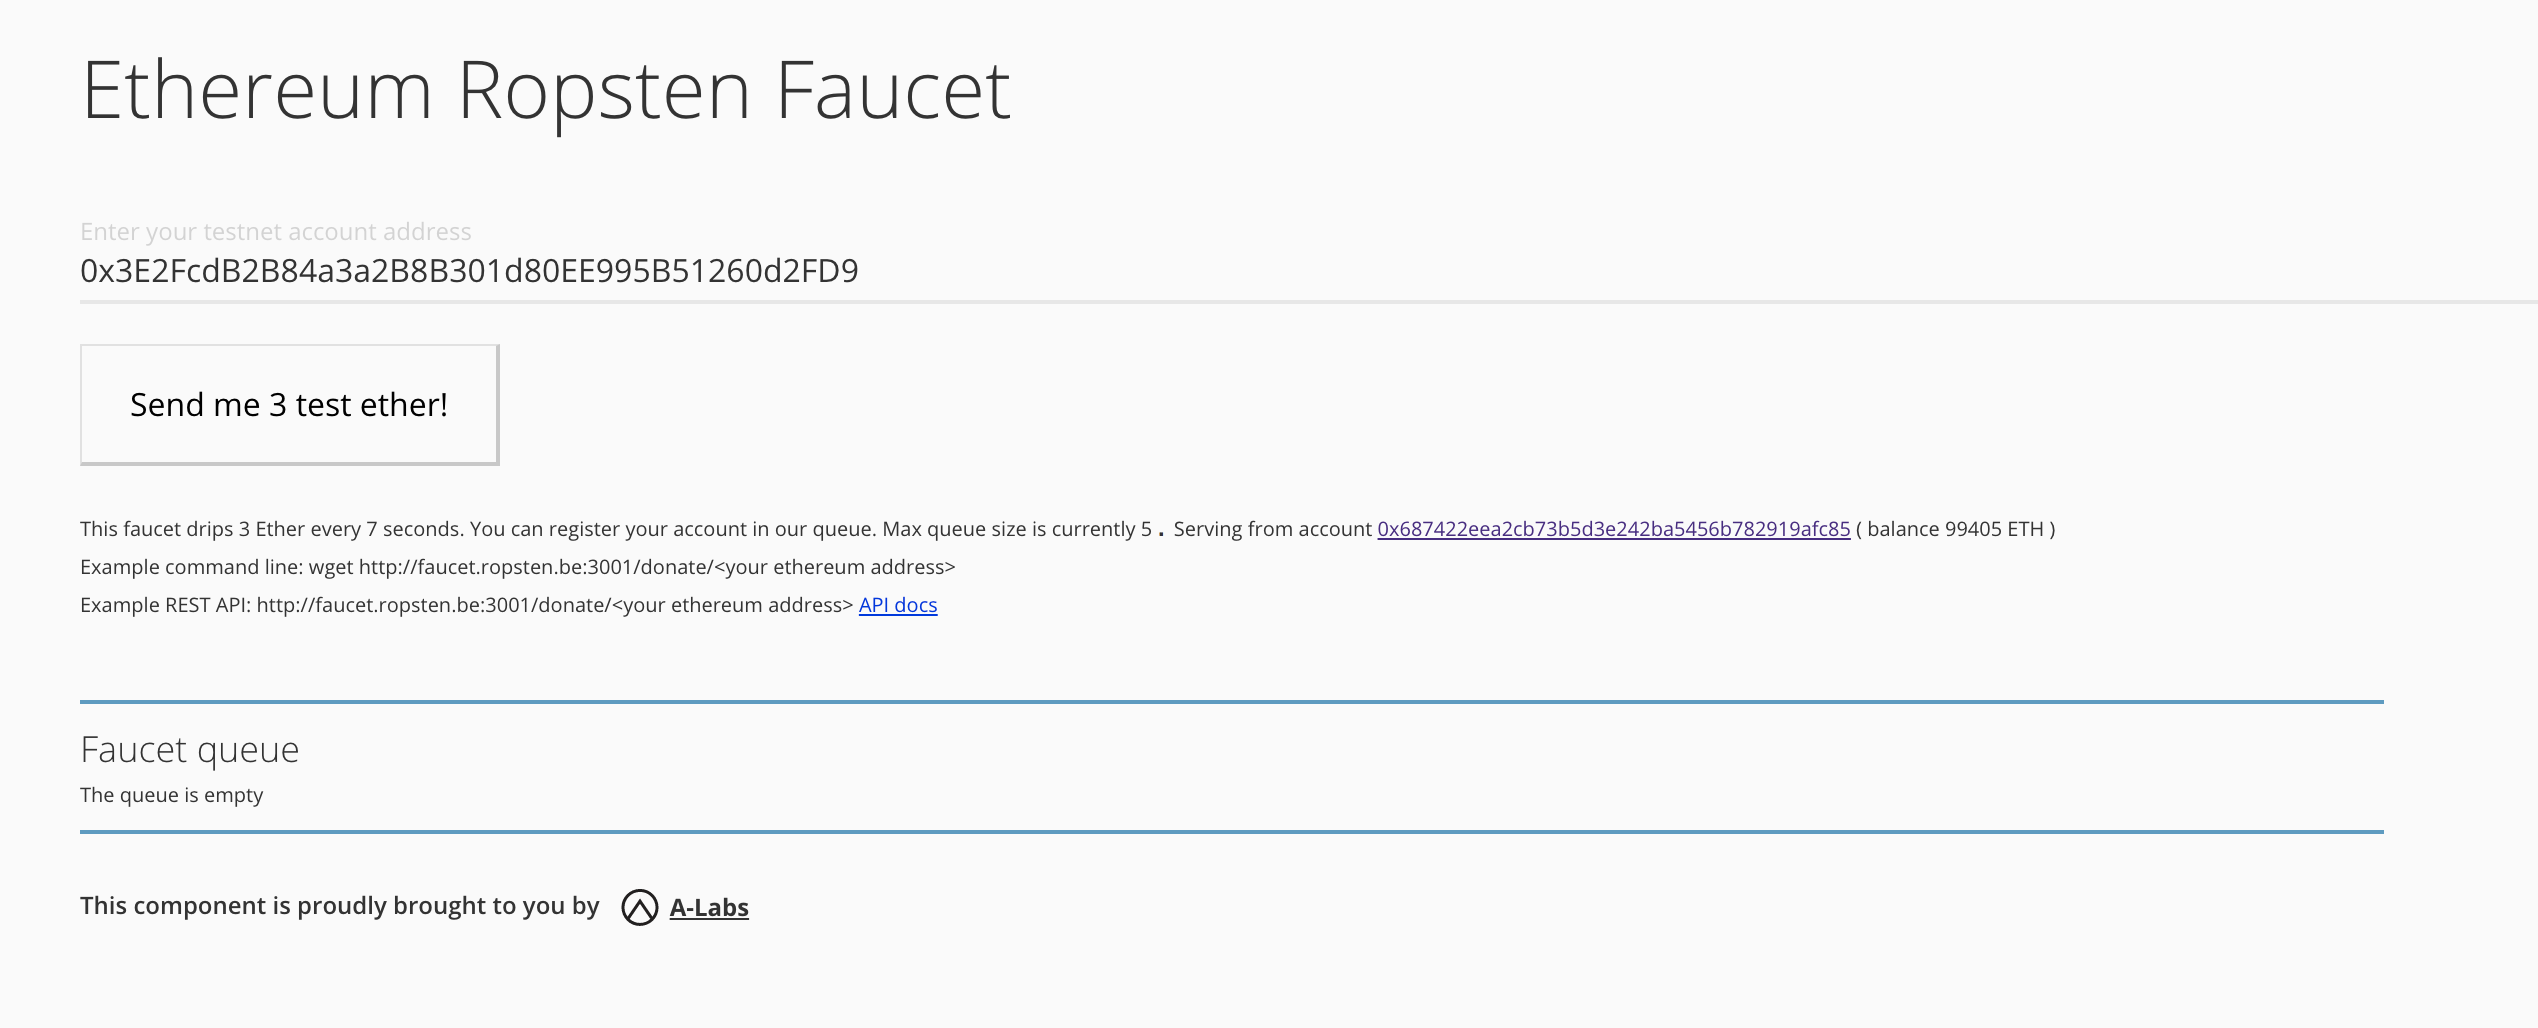
Before we can issue certificates, we need to have sufficient funds to cover the transaction fee. Why transaction fee? It is paid to miners for their work. The current fee is 0.00008 ETH (Well, only 0.082 dollars. Not a big deal). But remember? We are poor and we are on testnet, so why paying money? We can get some free coins from the network. You can request test coins by searching for “Testnet Faucet”, and entering your issuing public address.
To ease your burden, I have gotten one for you: http://faucet.ropsten.be:3001/. Enter your public key and click “Send me 3 test ether!”.
Then, after a few minutes, check the network to see if you get the money here: https://ropsten.etherscan.io/address/
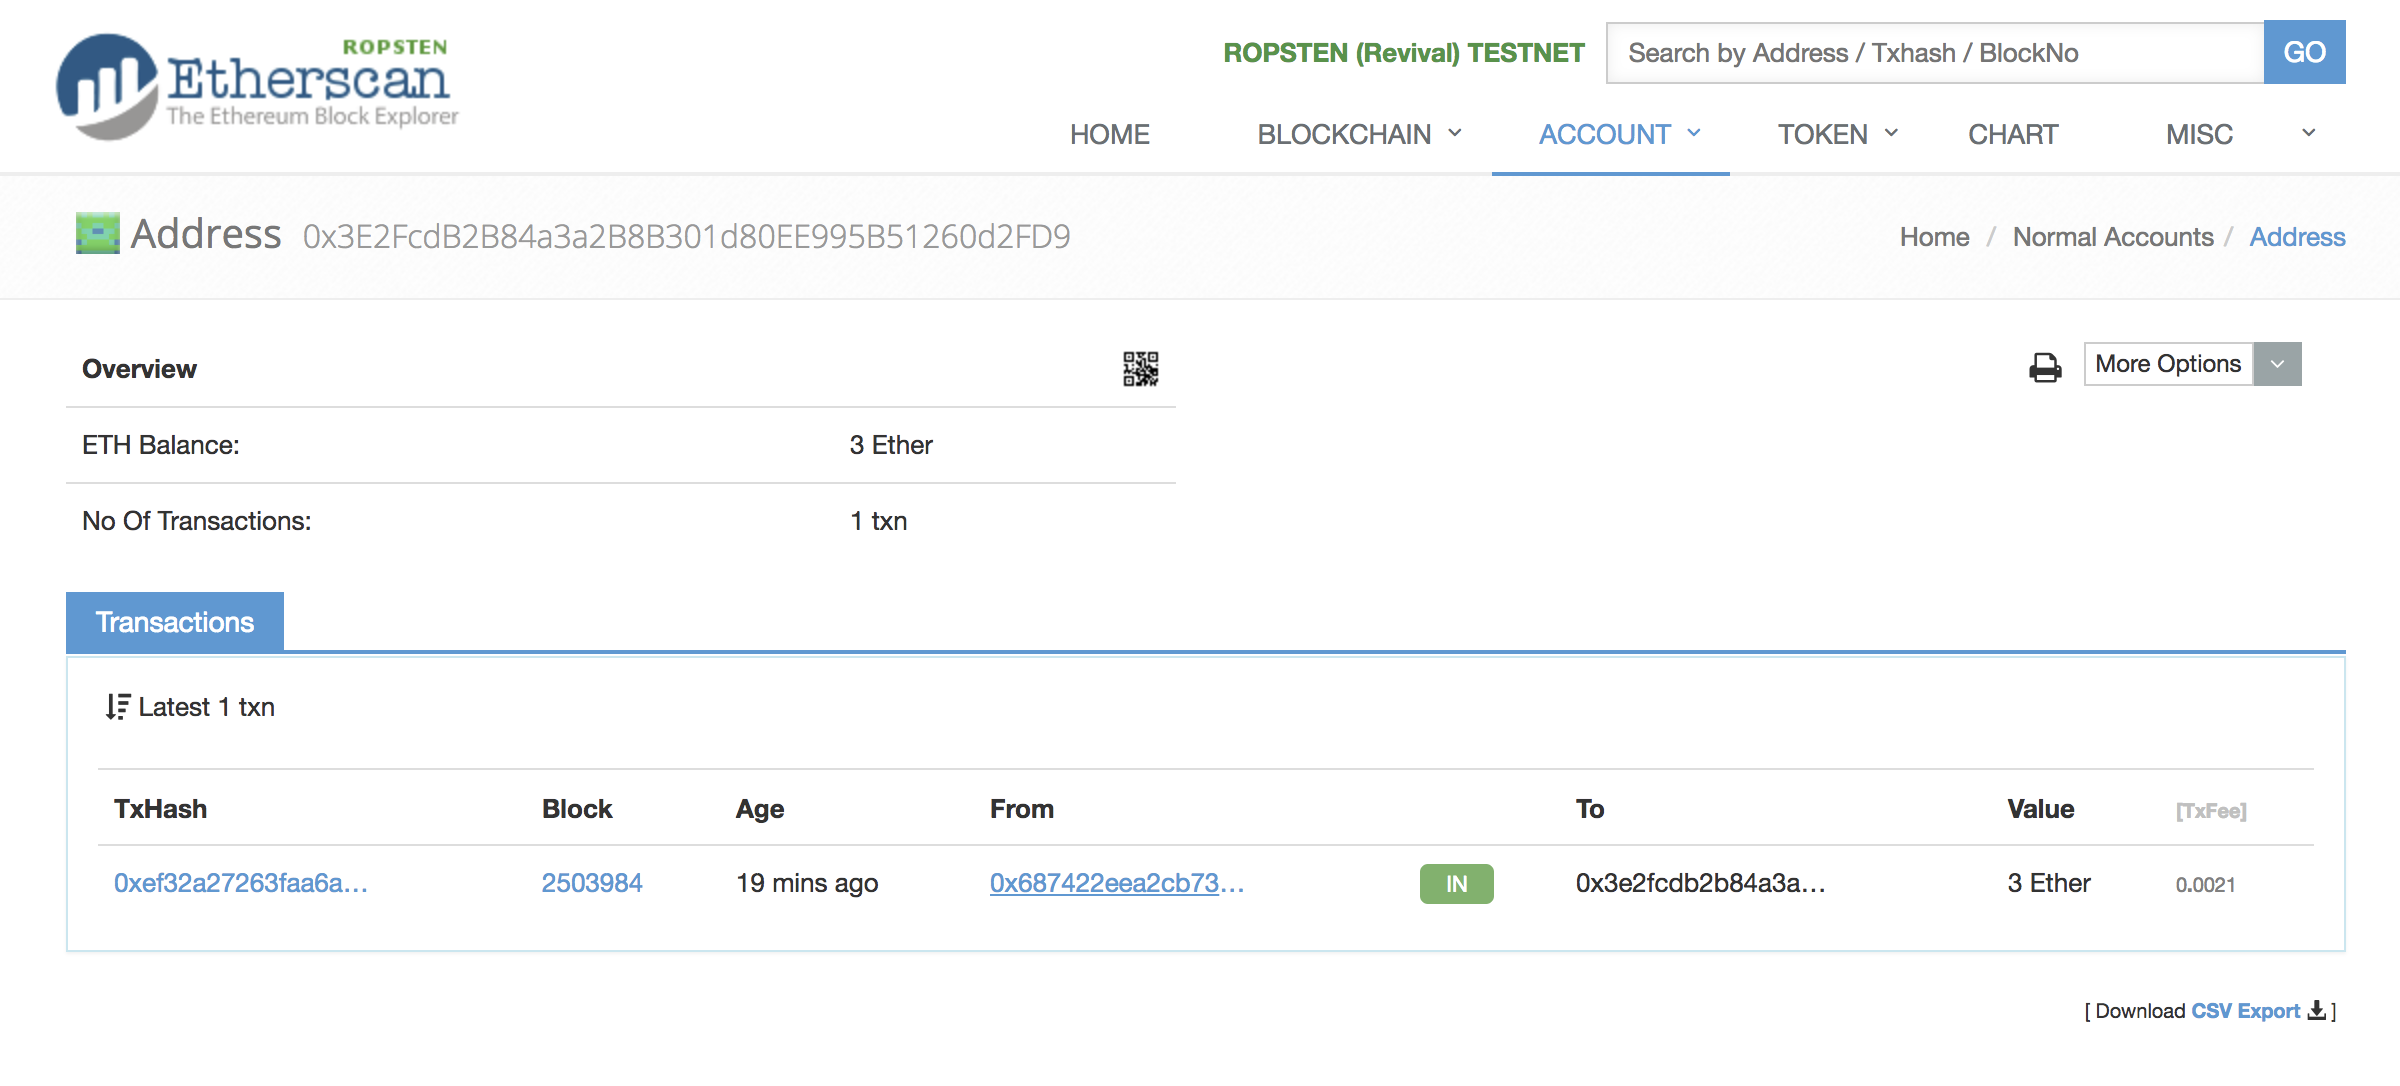
See the ETH Balance, it is 3 ETH. Cool, we are rich now (daydreaming).
Configuring cert-issuer
It is time to configure the instance. But wait, you need to save you private key to somewhere. It is recommended to store the private key on a USB stick and unplug it when not used. But to save time plugging in and out, we will save the private key locally. For example, /Users/xiaoxing/Projects/blockchain-certificates/ethereum folder and pk file.
Then, you should see a conf_ethtest.ini under the cert-issuer root folder. Open it using any of your favourite editor. Fill in the issuing_address, choose ethereum_ropsten as the blockchain, enter the usb_name and key_file as the private key storage location, and set the three dirs. An example is given here: https://gist.github.com/Yexiaoxing/74a55d49fbfd5275b698a9ad6f71c9d3. Remember to rename the config to conf.ini.
Issuing
Run cert-issuer -c conf.ini to see if everything is working.
You will see “No certificates to process” in the output. It is correct since we have not put any certificates. Let’s do it.
To save some time, we can use the sample certs:
1 | cp ./examples/data-testnet/unsigned_certificates/* ./data/unsigned_certificates |
Here you need to edit the unsigned certificates, replace “msBCHdwaQ7N2ypBYupkp6uNxtr9Pg76imj” with your public key.
Then, you need to find a place to host your issuer profile. What is issuer profile? From Open Badges, a Profile is a collection of information that describes the entity or organization using Open Badges. The main usage is to verify the cert is issued from proved person. Since we are using our owned public key, we need to host the profile file by ourselves.
Blockcerts itself provides two samples, one is issuer profile and another one is revocation list. First we need to download the two files.
- https://www.blockcerts.org/samples/2.0/issuer-testnet.json
- https://www.blockcerts.org/samples/2.0/revocation-list-testnet.json
Then, open the two files, and you will see a compressed json. What you need to do is first replace “msBCHdwaQ7N2ypBYupkp6uNxtr9Pg76imj” with your public key in issuer-testnet.json file, and upload it to somewhere, like GitHub, where you need to get a stable link for direct download. Then, replace the links in the two json files with the correct one.
It is hard to explain in language… You may check my examples here: https://github.com/Yexiaoxing/blockcerts-trial . You will also need to change the links in the sample cert.
Then, re-run again. You are… yes, expected to fail again. This time you need to modify site-packages/cert_issuer-2.0.11-py3.6.egg/cert_issuer/ethereum/connectors.py and add one more argument to the last get_providers_for_chain function, like:
1 | def get_providers_for_chain(chain, local_node=False): |
Update: You are no longer needed to do this modification since the repo has accepted my PR.
Then, run again and you should get the result:
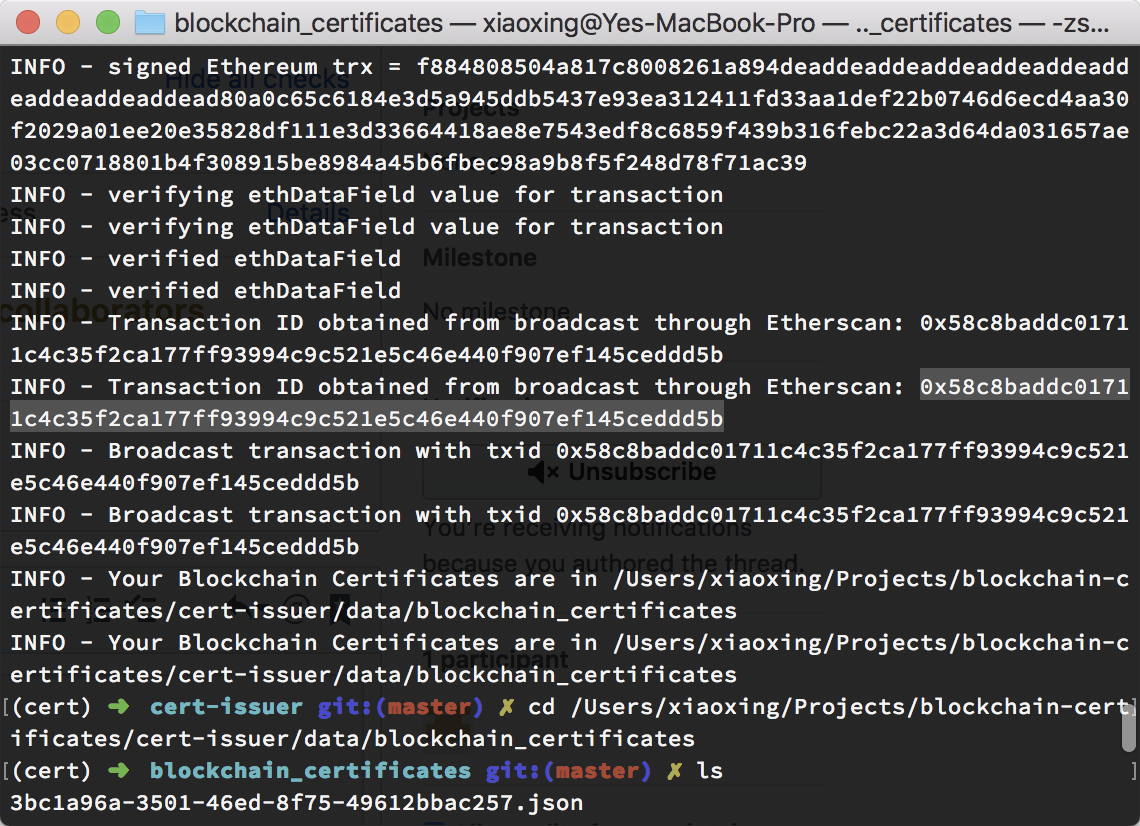
Read the debug infos, it is useful. You will find a string of txid, which is your transaction ID (highlighted in the screenshot). Now you can check this transaction using Etherscan (https://ropsten.etherscan.io). An example is given here: https://ropsten.etherscan.io/tx/0x58c8baddc01711c4c35f2ca177ff93994c9c521e5c46e440f907ef145ceddd5b.
Now you get a blockchain-baked certificate under data/blockchain_certificates. But how to verify it?
Verify the certificate
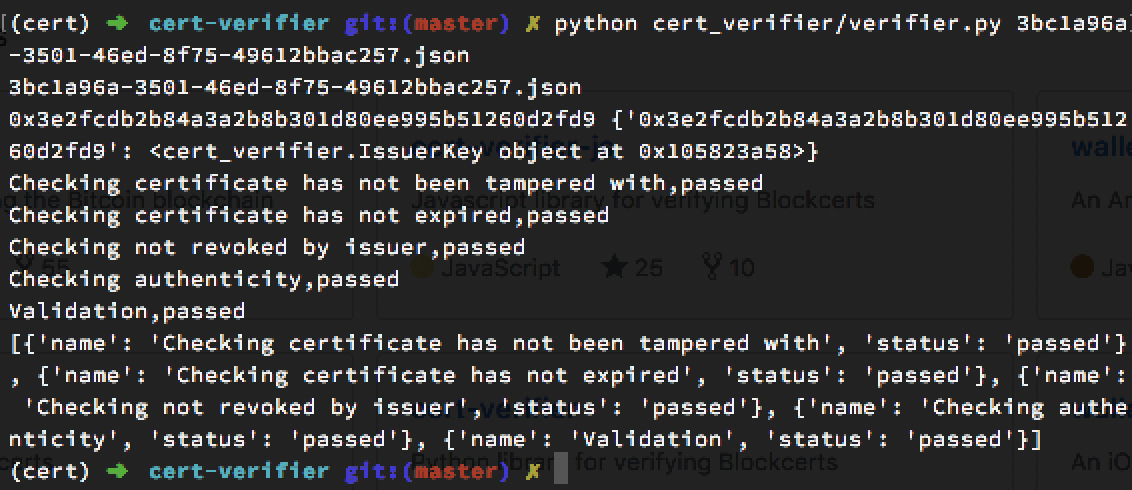
First, you need to clone the cert_verifier repo by:
1 | git clone [https://github.com/blockchain-certificates/cert-verifier.git](https://github.com/blockchain-certificates/cert-verifier.git) && cd cert-verifier |
Then, remember that you have a new certificate? Copy to the verifier folder, and run the verifier by
1 | python cert_verifier/verifier.py <filename> |
If your certificate is true, you will see some “passed” without “failed”.
Host a Certificate Viewer
What if you want to show your certificate to others? It is not a good idea to share… json file, right? The MIT project has provided a Flask app to display and verify blockchain certificates.
First, you need to clone the app:
1 | git clone [https://github.com/blockchain-certificates/cert-viewer.git](https://github.com/blockchain-certificates/cert-viewer.git) && cd cert-viewer |
Then, before you can use the app, you need to modify some config. Make a copy of conf_template.ini and name it as conf.ini. Follow the instructions here: https://github.com/blockchain-certificates/cert-viewer/#configuration.
After you finished the configure, install the required packages by
1 | pip install . |
Remember to copy the signed cert to cert_data/. Then run the app python [run.py](http://run.py/) -c conf.ini. And, visit the site using your favorite website, click on one of the recent cert and verify.
Well, unfortunately, cert-viewer isn’t support ethernet yet. So you will not be able to view your newly signed cert. But, you can get a sense by viewing the sample certs.
Other Resources
If you want to put this into production (though, I don’t recommend), you can download some tools here: https://github.com/blockchain-certificates/cert-tools. You can create your owned certificate template and instantiate certificate batch.
If you want to learn more about it, you can read the cert schema, which is based on Open Badges: https://github.com/blockchain-certificates/cert-schema